Introduction
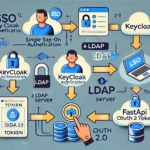
Identity Federation allows Keycloak to integrate with external identity providers such as LDAP, enabling centralized authentication and user management. By setting up LDAP (Lightweight Directory Access Protocol) federation in Keycloak, organizations can manage users securely while allowing them to authenticate against an existing directory service like Microsoft Active Directory (AD) or OpenLDAP.
In this guide, we’ll walk through setting up LDAP user federation with Keycloak, including the required configuration steps and testing the integration.
Prerequisites
Before configuring LDAP federation, ensure you have:
- A working Keycloak installation (check our previous guide)
- An LDAP server (such as OpenLDAP or Active Directory) accessible from Keycloak
- Administrator access to both Keycloak and LDAP
- Java 17 installed on the system running Keycloak
Step 1: Start Keycloak
If Keycloak isn’t running yet, start it using the following command:
bin/kc.sh start-dev
Access Keycloak at: http://localhost:8080
Login with your admin credentials.
Step 2: Configure LDAP in Keycloak
- Navigate to LDAP Configuration:
- Go to Keycloak Admin Console → User Federation.
- Click Add provider and select LDAP.
- Set up LDAP Connection:
- Edit Connection Details:
- Vendor:
Active DirectoryorOther - Connection URL:
ldap://<LDAP_SERVER>:389(For Secure LDAP useldaps://<LDAP_SERVER>:636) - Bind Type:
simple - Bind DN:
cn=admin,dc=example,dc=com - Bind Credential:
your_ldap_admin_password
- Vendor:
- Edit Connection Details:
- Configure User Search Settings:
- Users DN:
dc=example,dc=com - Username LDAP Attribute:
uid(for OpenLDAP) orsAMAccountName(for AD) - RDN LDAP Attribute:
cn - UUID LDAP Attribute:
entryUUID - User Object Classes:
inetOrgPerson
- Users DN:
- Synchronization Settings:
- Edit Mode:
READ_ONLY(users can authenticate but cannot be modified from Keycloak) - Sync Registrations:
ON(Optional: Users created in Keycloak are stored in LDAP) - Periodic Full Sync: Enable if required
- Edit Mode:
- Save and Test Connection
- Click Test connection to verify the connection.
- Click Test authentication to confirm credentials.
- Click Save.
Step 3: Sync Users from LDAP
Once configured, sync users from LDAP:
- Navigate to User Federation → LDAP → Synchronization Actions.
- Click Sync all users to pull users from LDAP.
- Go to Users in Keycloak to verify LDAP users appear.
Step 4: Test LDAP Authentication
- Logout of the Keycloak admin console.
- Try logging in with an LDAP user account.
- If authentication is successful, the setup is complete.
Optional: Enable Role Mappings from LDAP
If LDAP groups need to be mapped to Keycloak roles:
- Under User Federation → LDAP, enable Import Groups.
- Define Group DN and mappings.
- Save and sync groups.
Conclusion
You’ve successfully integrated Keycloak with LDAP for identity federation. Now, users can authenticate against the LDAP directory while Keycloak manages authentication and authorization for your applications.
Next Steps:
- Configure SSO with Keycloak
- Enable LDAP password policies
- Integrate OAuth 2.0/OpenID Connect authentication
Stay tuned for more Keycloak tutorials!