Introduction
Add Hostinger email to Gmail app to manage all your business and personal emails in one place. Whether you’re on Android or iPhone, integrating Hostinger email into the Gmail app streamlines communication and saves time. This guide will walk you through each step to set it up quickly and easily, without needing to log in separately via webmail.
How to Add Hostinger Email to Gmail App
Adding your Hostinger email to the Gmail app is a convenient way to centralize all your email communications. Here’s how to set it up properly using IMAP.
🧰 What You Need
- A working Hostinger email address (e.g., yourname@yourdomain.com)
- Email password
- Gmail app installed on your mobile device
📲 Step-by-Step Instructions
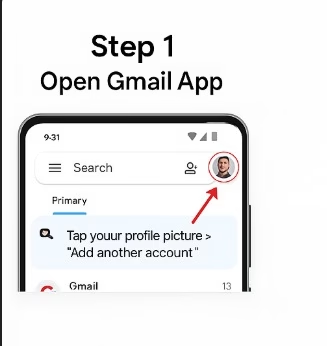
Open Gmail App
- Tap your profile picture > “Add another account”
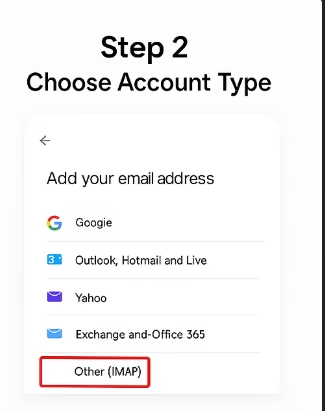
Choose Account Type
- Select “Other (IMAP)”
Enter Your Email Address
- e.g., yourname@yourdomain.com > Tap Next

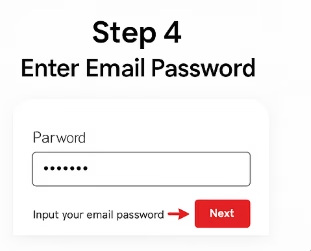
Enter Email Password
- Input your email password > Tap Next
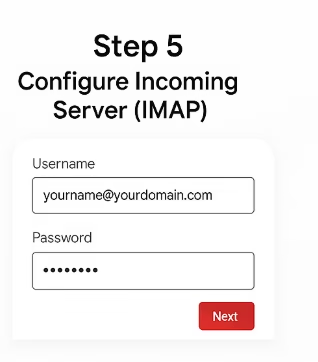
Configure Incoming Server (IMAP)
- Server: imap.hostinger.com
- Port: 993
- Security: SSL/TLS
- Username & Password: Same as above
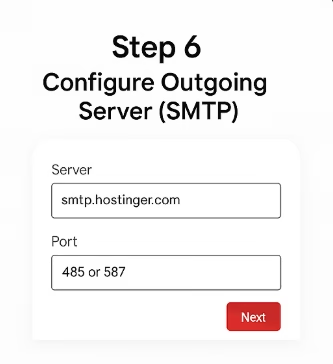
Configure Outgoing Server (SMTP)
- Server: smtp.hostinger.com
- Port: 465 or 587
- Security: SSL/TLS
- Use same credentials again
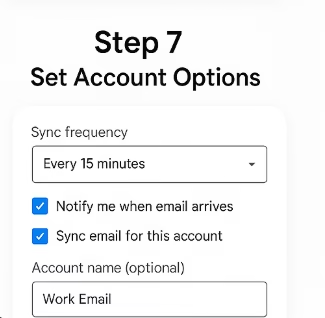
Set Account Options
- Choose sync frequency, notification settings, and label the account
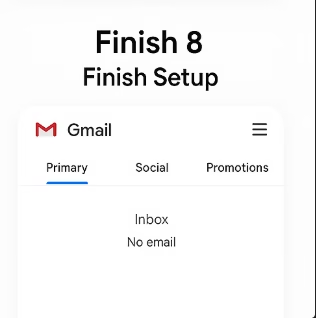
Finish Setup
- Gmail verifies and completes setup
- Your email is now active in the Gmail app
Understanding IMAP & Why It Matters
IMAP (Internet Message Access Protocol) allows real-time synchronization between your Gmail app and Hostinger email server. So any changes you make on one device (read, delete, reply) reflect across all devices instantly.
Learn more about IMAP vs POP and why IMAP is the preferred choice for mobile and cloud access.
For a complete comparison, you can also check Google’s guide on IMAP setup.
Conclusion
Now you know how to add Hostinger email to Gmail app in under five minutes. Just enter your IMAP and SMTP settings correctly, and you’re ready to receive and send business emails from the comfort of your favorite Gmail interface.