Managing access to AWS resources is crucial for ensuring security and compliance. Learning how to create an IAM user in AWS helps you control access and assign permissions effectively. This guide provides a clear, step-by-step process for creating an IAM user, generating a custom password, and attaching policies directly.
Log in to the AWS Management Console
- Go to the AWS Management Console.
- Enter your username and password to access your account.
Open the IAM Service
- Once logged in, search for IAM in the AWS console’s search bar.
- Select IAM from the results to navigate to the IAM dashboard.
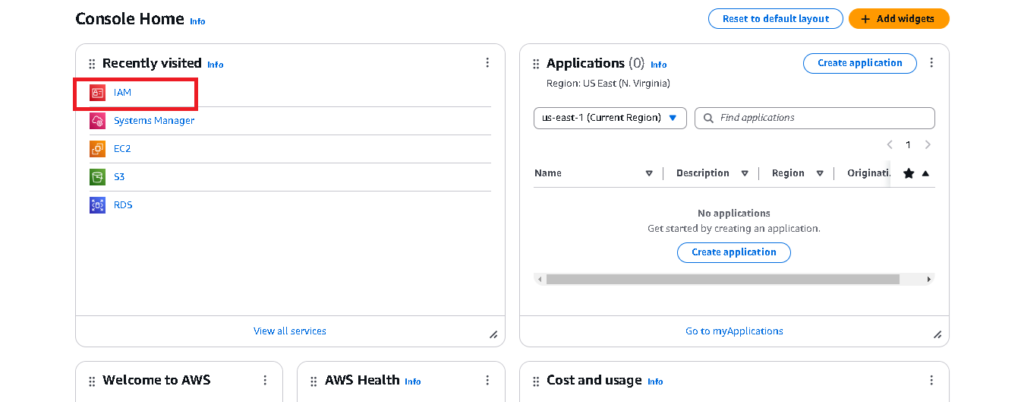
Navigate to the Users Section
- From the IAM dashboard, click on Users in the left-hand menu.
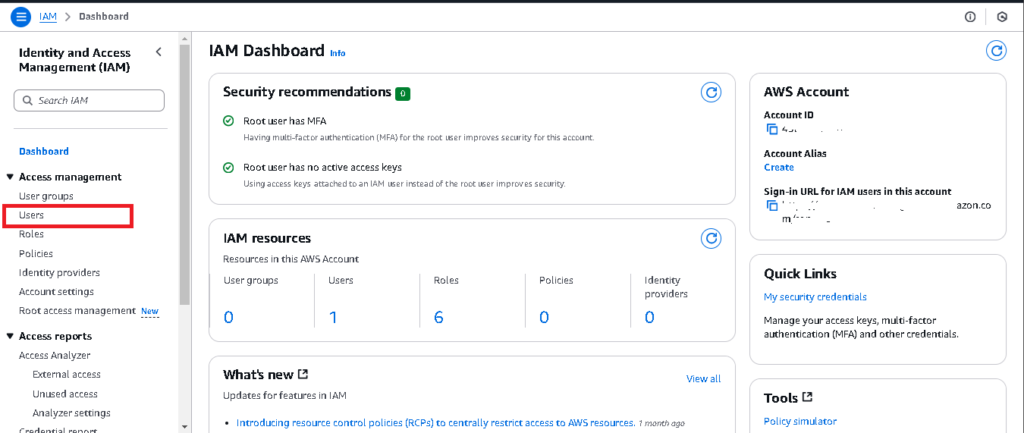
- Click the Create users to begin creating a new IAM user.

Configure the New User Details
- Enter the User Name (e.g.,
Developer1). - Select Password – AWS Management Console access for console login.
- Choose Custom password, and type a secure password for the user.
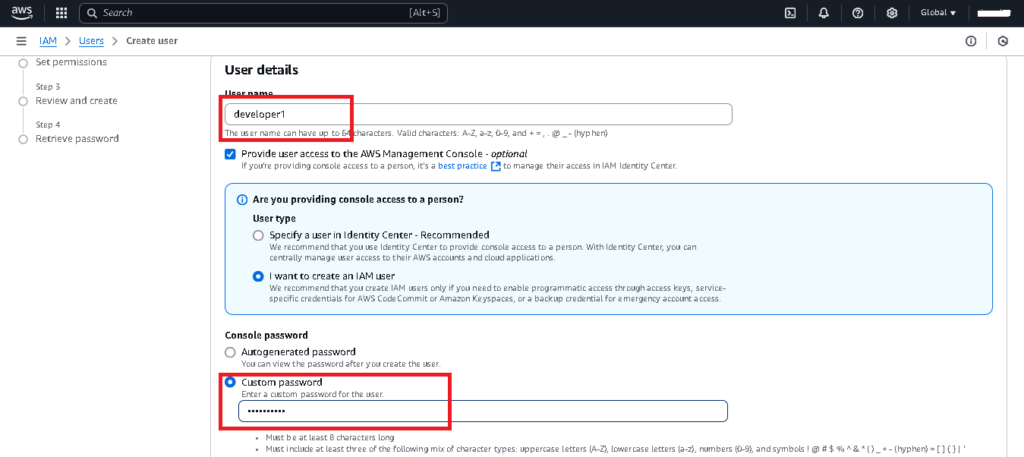
- Check the box to require the user to reset the password at next sign-in (optional for added security).
- then now click on the Next Button.
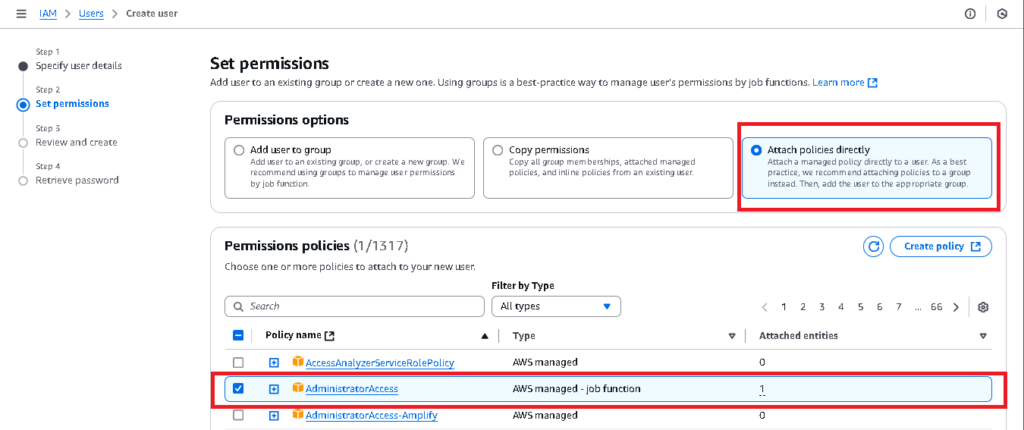
Attach Policies Directly
- Select Attach policies directly.
- Choose the required policy from the list, such as:
- AdministratorAccess for full control.
- ReadOnlyAccess for restricted access.
- Use the search bar to quickly locate specific policies.
- then click Again Next Button for then next Step.
Add Tags (Optional)
- Tags help you organize users. Add tags by providing a key-value pair (e.g.,
Key: Department,Value: DevOps). - Click Next to continue.
Review and Create
- Review the user details and permissions.
- Confirm everything is correct and click Create user.
Download and Share Credentials
- After the user is created, download the .csv file containing login credentials.
- Securely share the file with the user. They will need it to log in.

Helpful Resources
- AWS Documentation: Learn more about IAM Users.
- AWS Security Best Practices: Follow AWS security guidelines
- Setting Up MFA for Your AWS Account