If you’re looking to transfer your domain from AWS (Route 53) to Hostinger, you’ve come to the right place. Whether you’re seeking a more budget-friendly hosting solution or want to consolidate your domains, the transfer process is straightforward when broken into manageable steps. This guide will walk you through the entire process, from preparation to completion.
Why Transfer Your Domain to Hostinger?
Hostinger offers affordable hosting solutions, a user-friendly interface, and robust domain management tools, making it an excellent choice for managing your domains. Plus, transferring your domain allows you to manage hosting and domain registration all in one place, simplifying your workflow.
Step 1: Prepare Your Domain on AWS
Before initiating the transfer, you need to prepare your domain in AWS Route 53.
1. Ensure the Domain is Eligible for Transfer
- The domain must be at least 60 days old and not locked or in a pending state.
- Verify that your domain’s WHOIS contact information is up-to-date.
2. Unlock the Domain
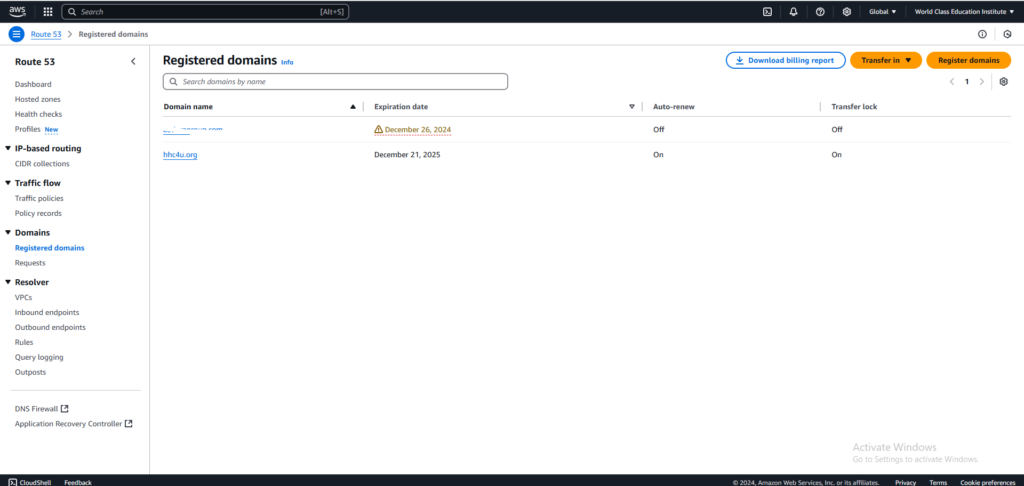
- Log in to your AWS Management Console and go to the Route 53 service.
- Navigate to Registered Domains and select the domain you want to transfer.
- Under the Domain Lock section, click Disable to unlock your domain.
If you domain transfer is locked in AWS you will get the message on Hostinger.
after allow from Route 53 side by disabling transfer lock off.You will see in hostinger that we can tranfer the domain.
3. Initiate the Transfer on AWS
4. Retrieve the Authorization Code
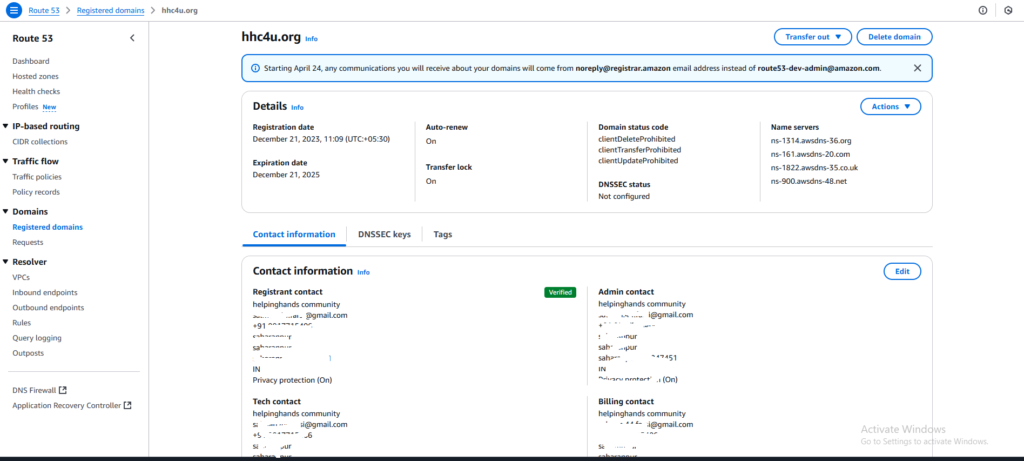
- In Registered Domains, click on the domain name.
- Locate the Transfer Domain section and click Retrieve Authorization Code.
- Save this code as it’s required to authorize the transfer to Hostinger.
Step 2: Initiate the Transfer on Hostinger
1. Log in to Your Hostinger Account

- Access the Hostinger dashboard using your credentials.
2. Start the Domain Transfer
- Navigate to Domains in the dashboard and select Transfer Domain.
- Enter the domain name you’re transferring and click Next.
3. Enter the Authorization Code
- Paste the authorization code you retrieved from AWS Route 53.
- Confirm the details and proceed.
4. Complete the Payment
- Pay the transfer fee (usually includes a one-year extension of your domain registration).
Step 3: Approve the Transfer
1. Check Your Email
- The email associated with your domain’s WHOIS information will receive a confirmation request.
- Open the email and follow the instructions to approve the transfer.
2. Wait for the Transfer to Complete
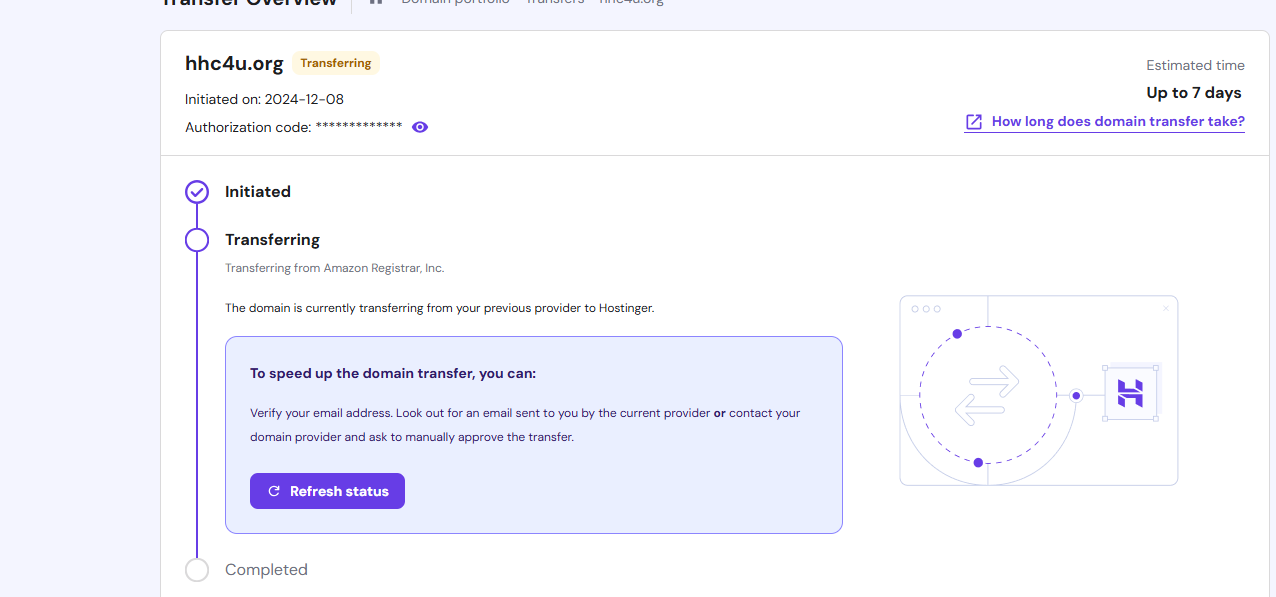
- The transfer process may take up to 5–7 days, depending on your domain extension.
- You can monitor the transfer status in the Hostinger dashboard.
You might like the blog related to What You Need to Know Before Transferring a Domain.