Introduction
To deploy a backend on Render, you need to follow a series of simple steps to get your application live. Render provides a seamless experience for deploying backend services, making it an ideal choice for developers. This guide will walk you through each step of the deployment process.

Step 1: Prepare Your Project
- Set Up Your Codebase:
- Ensure your backend project is structured properly. Here’s a common structure for a Node.js application:
/my-backend-app ├── /src (Contains source code)├── .env (Environment variables) ├── package.json (Project metadata) └── server.js (Entry point for the application)2. Initialize Your Project:
- If you haven’t already, initialize your project with Git:
git init
3. Create a Repository:
- Create a new repository on GitHub or GitLab and push your code there.
4. Install Necessary Packages:
- If you’re using Node.js with Express, install the required packages:
npm init -y npm install express mongoose dotenv
5. Create Your Server:
- Create a file named
server.jsin your project root:
const express = require('express'); const mongoose = require('mongoose'); const dotenv = require('dotenv'); dotenv.config(); const app = express(); const PORT = process.env.PORT || 5000; app.use(express.json()); mongoose.connect(process.env.MONGODB_URI, { useNewUrlParser: true, useUnifiedTopology: true }) .then(() => console.log('MongoDB connected')) .catch(err => console.error(err)); app.get('/', (req, res) => { res.send('API is running'); }); app.listen(PORT, () => { console.log(`Server running on port ${PORT}`); });6. Create a .env File:
- Create a
.envfile in your project root to store sensitive information:MONGODB_URI=your_connection_string_here
more details visit this: github push
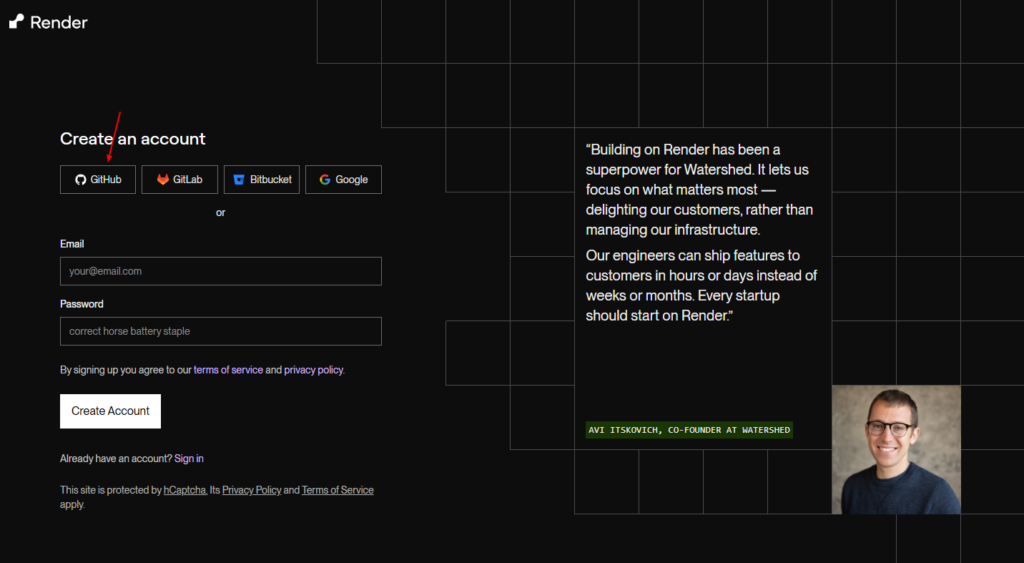
Step 2: Create a Render Account
- Sign Up for Render:
- Go to Render and sign up for an account if you haven’t already.
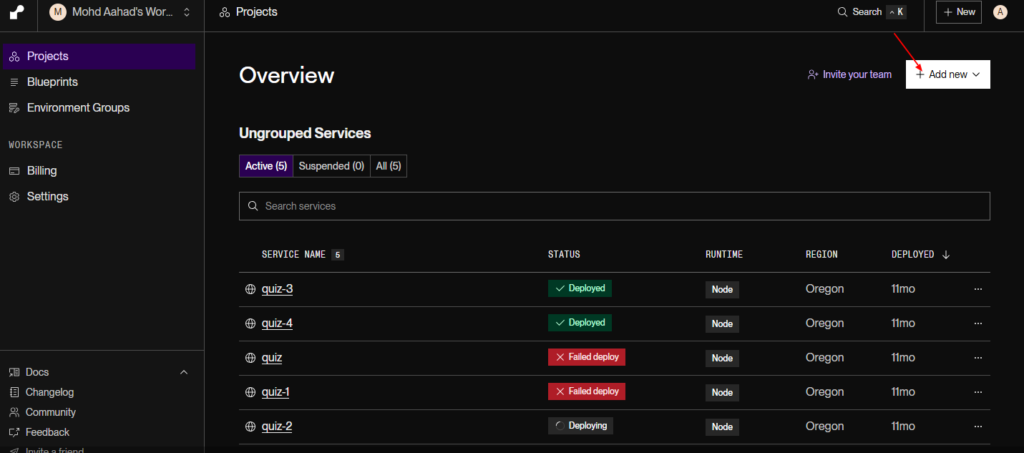
Step 3: Create a New Web Service on Render
- Create a New Service:
- Once logged in, click on “Add New” and select “Web Service.”
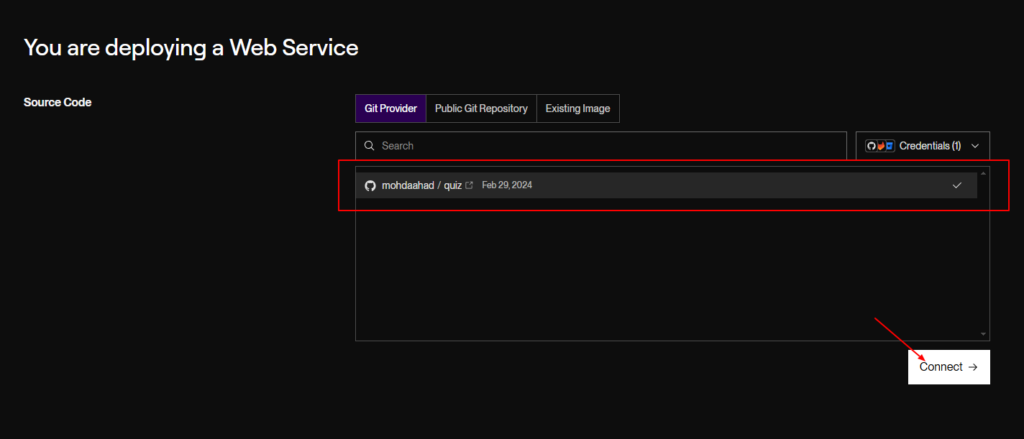
2. Connect Your Repository:
- Choose to connect your GitHub or GitLab account.
- Select the repository containing your backend code.
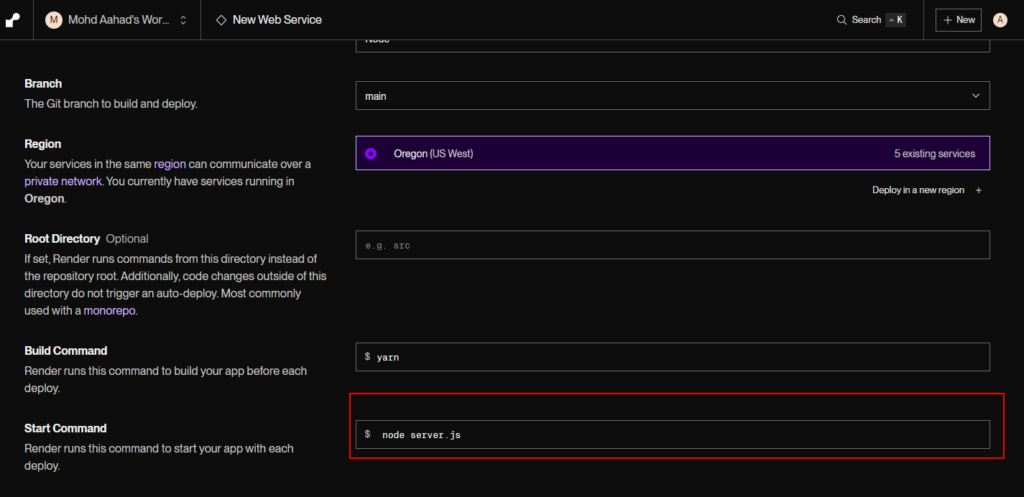
3. Configure Your Service:
- Name your service: Choose a name that reflects your application.

- Select the branch: Choose the branch you want to deploy (usually
mainormaster).

- Set the build command: For Node.js applications, this will typically be:
npm install - Set the start command: This should point to your server file:
node server.js

Step 4: Configure Environment Variables
- Add Environment Variables:
- In the “Environment” section of your Render service configuration, add any necessary environment variables:
MONGODB_URI: Your MongoDB connection string.
- In the “Environment” section of your Render service configuration, add any necessary environment variables:
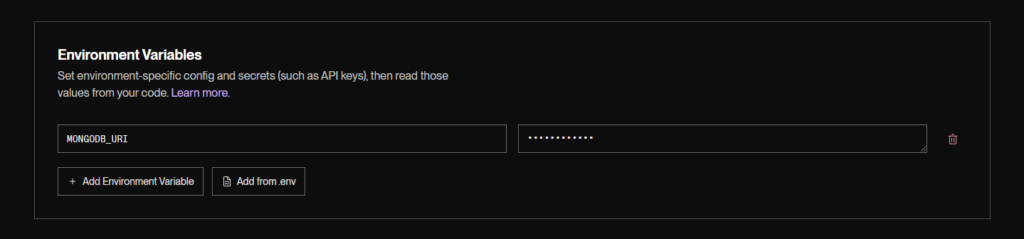
for mongo url more about checkout: MongoDB Create
Step 5: Deploy Your Backend
- Create the Web Service:
- Click on “Create Web Service” to initiate the deployment process. Render will automatically build and deploy your service.

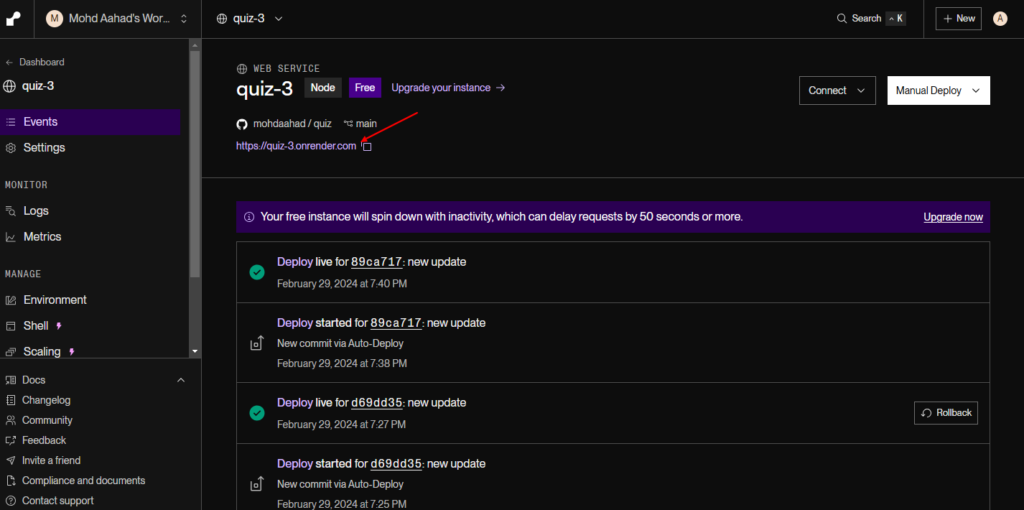
2. Monitor the Deployment:
- You can monitor the deployment logs to see the progress and check for any errors. Once the deployment is complete, Render will provide a live URL for your service.

Step 6: Test Your Application
- Access Your Live API:
- Visit the URL provided by Render to test your API. You can use tools like Postman or your browser to access the endpoint:
https://your-render-service-url.com/
- Visit the URL provided by Render to test your API. You can use tools like Postman or your browser to access the endpoint:
2. Verify Functionality:
- Make sure your API routes are working as expected. Test any endpoints you’ve created to ensure data is being processed correctly.